2. How Much Do Custom Challenge Coins Actually Cost? (The Real Pricing Breakdown)
What does it cost to have a challenge coin made?
In 2026, a typical 1.75-inch custom challenge coin costs between $4.00 and $11.50 per unit, depending on the order quantity, design complexity, and metal finish. Additionally, manufacturers charge a one-time die (mold) fee ranging from $110 for standard 2D designs to $220 or more for complex 3D sculpted coins.
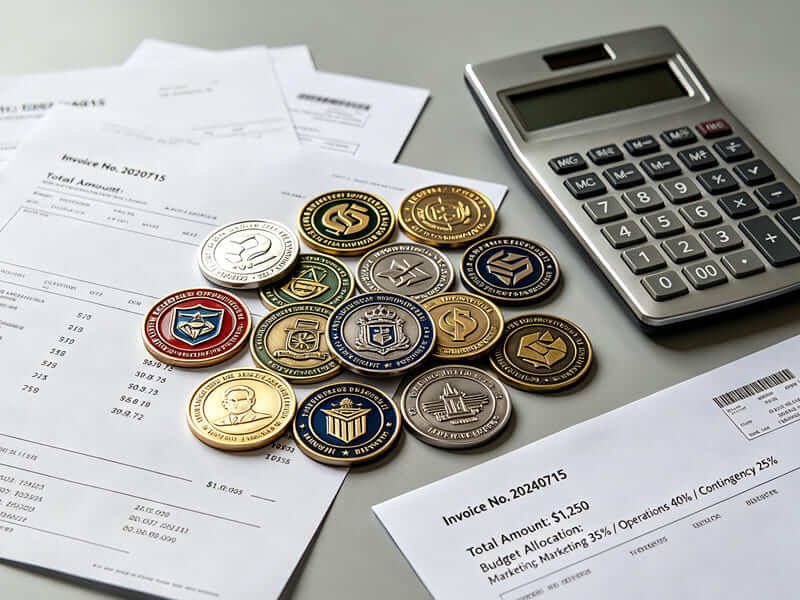
If you have spent any time searching for pricing online, you have probably seen numbers all over the map. One website promises coins for $0.99, while another quotes you $8.00 per piece. Why is there such a massive gap? The honest truth is that pricing is highly predictable once you understand the actual components that make up a manufacturing quote.
The Truth About the Die Fee (Mold Cost)
Almost every custom order includes a die fee, but many buyers do not understand what it is. A die is a heavy block of hardened steel. Highly precise CNC machines carve your exact design into this steel block. This steel die is then used to stamp your design into blank metal coins under immense pressure.
Because carving steel takes time and precision engineering, it is billed as a separate line item. A simple, flat 2D mold usually costs around $110. If you want a 3D sculpted design—like a highly detailed face or an airplane—the die requires deeper engraving and much more machine time, pushing the cost to $220 or higher.
Here is the good news: This is a strict one-time fee. The factory stores your steel die. If you run out of coins and need to place a reorder next year, you will not pay that die fee again. Your per-unit cost will drop significantly.
The Quantity Curve: Why Ordering 50 Coins Feels Expensive
Quantity is the single largest factor driving your per-coin price. The physical labor required to set up the heavy machinery, mix the enamel colors, and prepare the plating baths is the exact same whether you are making 50 coins or 5,000 coins.
When you order only 50 coins, those fixed setup costs are divided among a very small number of pieces. This is why a small batch might cost you $11.50 per coin. However, if you increase that order to 100 coins, the setup costs are spread out much wider. Suddenly, the price drops sharply to around $7.75 per coin. For this reason, we almost always advise organizers to order at least 100 pieces to hit the pricing “sweet spot.”
The “Free Shipping” Illusion
Many suppliers advertise “free shipping” to get your attention. Let’s clear the air: shipping heavy metal across the country or around the world is never free. Companies that offer free shipping have simply calculated the average shipping weight and baked that cost directly into the per-coin price. Always compare the final total price at checkout, rather than just the advertised unit price.
Real-World Pricing Scenarios
To give you a clearer picture of budgeting, let’s look at three very common ordering scenarios based on actual 2026 industry data.
| Scenario & Purpose | Coin Specs | Estimated Unit Price | Die Fee (One-Time) | Total Estimated Cost |
|---|---|---|---|---|
| Small Team Commemoration (Budget-friendly) | Qty: 50 Size: 1.75″ Style: Standard 2D | ~$11.50 | ~$150.00 | ~$725.00 |
| Large Event / Deployment (Standard sweet spot) | Qty: 250 Size: 2.0″ Style: 2D with Edge Engraving | ~$5.75 | ~$150.00 | ~$1,715.00 (Includes $125 for edge text) |
| VIP / Commander’s Gift (Premium & high-end) | Qty: 100 Size: 2.0″ Style: 3D Sculpted, Dual Plating, Epoxy | ~$8.10 + Premium Add-ons | ~$280.00 | ~$1,450.00 |
If you want to see an even more granular breakdown of costs, check out our in-depth article on Understanding custom pin pricing and How much does it cost to have a challenge coin made.
3. Quality vs. Cheap Coins: How Some Manufacturers Cut Corners
Why do challenge coin prices vary so much between manufacturers?
Challenge coin prices vary significantly because cheap manufacturers cut corners by using thinner metal blanks, lightweight zinc fillers instead of solid brass, 1-micron plating instead of durable 5-micron plating, and shipping defective coins rather than baking quality control rejection rates into their pricing.
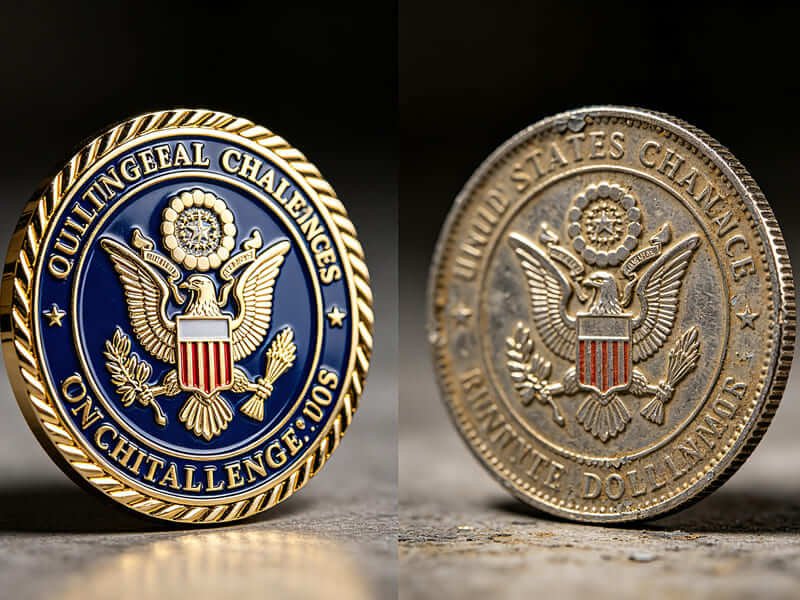
If you gather three quotes for the exact same design, you might see a massive difference. One factory says $2.50 per coin, while another says $6.00. It is incredibly tempting to just go with the lowest bidder. But you need to understand exactly what you are sacrificing for that lower price.
The Plating Thickness Trap
Metal plating (the thin layer of gold, silver, or copper applied to your coin) is measured in microns. High-quality factories use plating that is around 5 microns thick. This ensures a deep, rich color that will survive years of being carried in a pocket or handled daily.
Cheap operators? They use 1-micron plating. It looks perfectly fine in a photograph on their website. But after a few months of touching the coin, the oils from your fingers and normal friction will literally rub the gold finish right off the raised edges. You are left with a dull, ugly piece of exposed base metal.
Base Material Quality and Weight
Quality coins are struck from solid brass or dense, high-grade zinc alloy. They have a satisfying heft when you toss them into your hand. Factories offering rock-bottom prices often use extremely cheap iron or hollowed-out zinc fillers. Iron is highly prone to rusting over time, and lightweight zinc feels like cheap arcade tokens. The cost difference between good brass and cheap iron is maybe a dollar per coin, but the difference in perceived value is enormous.
The Hidden Cost of Rejection Rates
This is the secret no one talks about in the industry. Making custom metal products is a messy process. Enamel paint sometimes bleeds over the metal lines. Plating can sometimes bubble. A reputable manufacturer inspects every single coin. If there is a blemish, they throw it in the scrap bin and make a new one. They bake this “rejection rate” into their pricing.
A factory charging you $2.00 a coin does not have the budget for quality control. They will box up every single coin that comes off the line—paint bleeds, scratches, and all—and ship them to you. The visible price is lower, but you end up with 20% of your order being totally unusable.
To protect your investment, always do your homework on who is actually making your products. You can read more about evaluating suppliers in our guide on How to choose a pin manufacturer.
4. Size, Thickness, and Weight: Specs That Drive Perception
What is the standard size and thickness for a custom challenge coin?
The standard size for a military or corporate challenge coin is between 1.75 inches and 2 inches in diameter, with a standard thickness of 3mm. Increasing the thickness to 4mm adds roughly 33% more weight, giving the coin a heavier, premium feel associated with high-level awards.
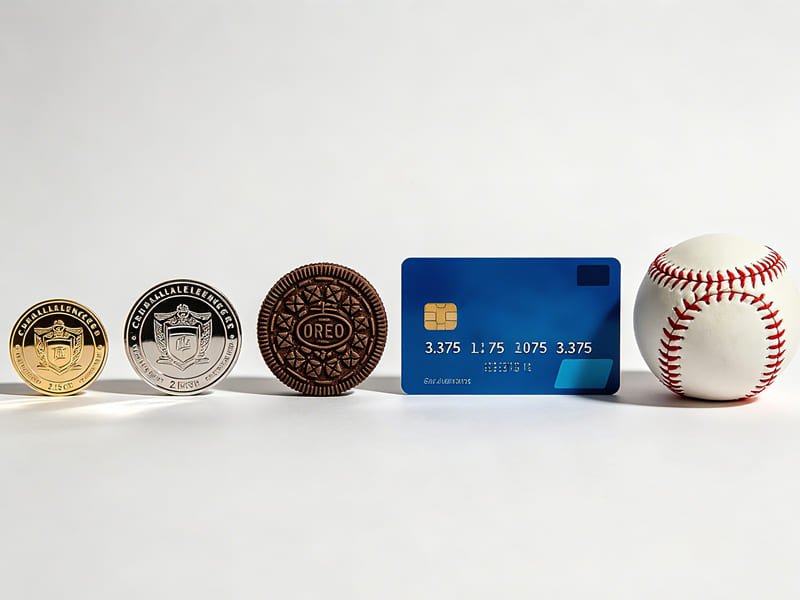
When you are planning your order, the physical dimensions of the coin dictate everything else. The size affects how much space you have for your artwork, how heavy the coin feels, and how much it will cost to produce and ship. Bigger is not always better; it is about finding the right fit for your specific audience.
Choosing the Right Diameter
People often struggle to visualize just how big a 2-inch coin actually is until they hold it. Here is a handy reference guide comparing standard coin sizes to everyday objects, so you can make an informed decision.
| Coin Diameter | Everyday Object Comparison | Best Use Case |
|---|---|---|
| 1.5″ (38.1mm) | Eisenhower Silver Dollar | Everyday pocket carry, lightweight tokens, high-volume giveaways. |
| 1.75″ (44.5mm) | Oreo Cookie | The most popular size. Perfect balance of detail and portability. Standard military size. |
| 2.0″ (50.8mm) | Height of a Credit Card | Commander’s coins, premium corporate awards, heavy presentation pieces. |
| 2.5″ (63.5mm) | Tennis Ball | Desk displays, highly intricate artwork. Too heavy for comfortable pocket carry. |
As you increase the diameter, the amount of raw metal needed increases exponentially, which drives up your unit cost. If you have a tight budget, sizing down from 2 inches to 1.75 inches is the easiest way to save money without sacrificing design quality.
The Power of Thickness
Here is a professional designer’s secret: if you want to make a coin feel incredibly expensive and important, do not increase the width—increase the thickness.
The industry standard thickness is 3mm. It feels solid and reliable. However, if you upgrade the thickness to 3.5mm or 4mm, you are adding up to 33% more physical weight to the metal blank. Human beings subconsciously associate heavy weight with high value. When you hand someone a 4mm thick coin, their eyes light up because it feels significant. It feels like an award that was earned.
For more details on how dimensions impact your budget, refer to our article on How pin size affects cost.
5. Choosing the Right Manufacturing Method & Finishes
What is the difference between 2D, 3D, and printed challenge coins?
The main difference lies in depth. 2D coins have clean, flat raised and recessed levels, perfect for logos. 3D coins feature multi-level sculpted depth, ideal for faces or buildings. UV printed coins are used when a design requires complex color gradients or photographs that metal and enamel cannot replicate.
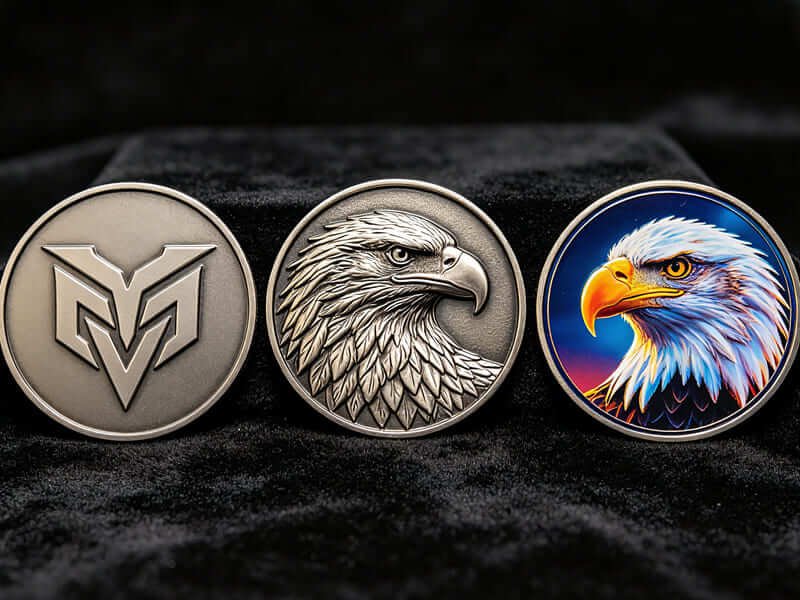
Once you know the size of your coin, you must decide how the factory will actually mold the metal. This decision fundamentally changes how your artwork translates from a computer screen into reality.
2D vs. 3D vs. UV Printing
A lot of buyers mistakenly assume that “3D” just means the coin looks better. That is not true. It is entirely dependent on the type of artwork you have.
- 2D Stamping (Die-Struck): This method creates exactly two levels of metal: raised and recessed. It creates crisp, sharp, clean lines. If your organization’s logo is vector-based, uses bold text, or features a standard shield, 2D is absolutely the best choice.
- 3D Sculpting (Die-Casting): This method creates multiple, sloping levels of depth. It is like a tiny bronze statue. You must use 3D if your design includes a human face, an animal mascot (like an eagle or bulldog), a vehicle, or a detailed building. However, 3D is terrible for tiny text, as the sloping metal makes small letters unreadable.
- UV Printing: Metal and liquid enamel paint cannot create gradients (like a sunset fading from orange to yellow) or photographic details. If your brand guidelines require exact color shading, the factory will use advanced UV printers to apply the image directly onto the metal surface, sealing it with a protective clear coat.
Selecting Plating Finishes: Antique vs. Polished
The plating you choose completely alters the personality of the coin.
Antique Finishes (Antique Gold, Silver, Copper, Brass): This is heavily recommended for almost all military coins and any coin utilizing 3D artwork. The factory applies a dark wash over the metal that settles into all the tiny recessed areas. This creates artificial shadows, making text and relief details pop incredibly well without blinding glare. Furthermore, antique finishes hide fingerprints and scratches beautifully.
Polished Finishes (Bright Gold, Shiny Silver): These look incredibly bright, modern, and jewelry-like. They are fantastic for corporate recognition awards that sit safely in a display case. But be warned: highly polished surfaces act like mirrors. If this coin is going to be carried in a pocket with keys, it will show scratches very quickly.
Dual Plating: Want to really impress? Dual plating allows you to combine two different metal finishes on the same coin—for example, a shiny gold border surrounding an antique silver center. It requires intense manual labor and usually adds $0.70 to $1.00 per coin, but the resulting contrast is breathtaking.
Adding Color: Soft Enamel vs. Hard Enamel
If you want to add color to your metal, you have two primary options. Soft enamel involves pooling paint into the recessed areas of the coin. The paint dries slightly below the raised metal borders, giving the coin a wonderful, tactile texture when you run your thumb over it. Hard enamel (or imitation hard enamel) involves overfilling the areas with paint and baking it at high temperatures, then polishing the entire coin perfectly flat. It feels smooth like glass and looks like high-end jewelry.
To dive deeper into the differences between these options, check out our comprehensive guides on Hard enamel vs soft enamel pins, Custom pin metal plating options, and 3D mold vs 2D mold for pins.
6. Functional Upgrades and Custom Edges (The “Wow” Factor)
How can I make my challenge coin design stand out?
You can make your challenge coin stand out by upgrading from a standard flat edge to a custom cut edge like a rope, diamond cross-cut, or oblique line. You can also add functional features like bottle openers, sequential numbering for limited editions, spinner elements, or protective epoxy dome coatings.
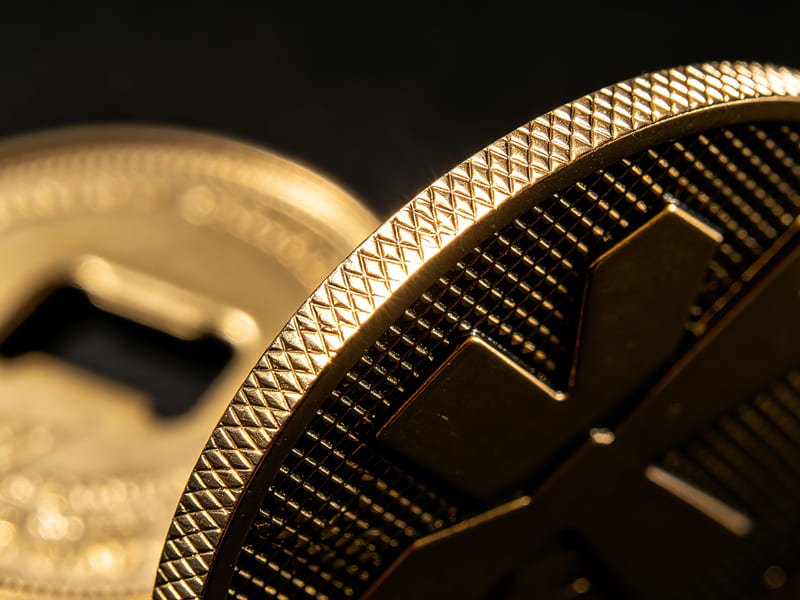
If you want people to look at your custom token and say “Wow,” you need to think beyond the flat surface. The edges and the interactive elements are what separate a basic promotional item from a premium, highly coveted keepsake.
Elevating the Design with Custom Edges
Most standard coins come with a smooth, flat edge. It is clean and simple. But if you want to add a touch of class and craftsmanship, the factory can use specialized machines to carve patterns directly into the rim of the metal. Let us look at some of the most popular edge upgrades available in 2026.
| Edge Style | Appearance & Texture | Best Use Case |
|---|---|---|
| Rope Edge | Looks like a twisted ship’s rope wrapping around the coin. | Navy, Coast Guard, nautical themes, and classic military designs. |
| Cross-Cut (Diamond Cut) | Interlocking diagonal cuts that catch the light and sparkle like diamonds. | High-end corporate awards, police badges, and VIP gifts. |
| Oblique Line | Slanted, elegant lines resembling a fine watch bezel. | Modern anniversary events and sleek organizational tokens. |
| Spur Edge | Sharp, distinct cuts that look like gears or cowboy spurs. | Motorcycle clubs, tactical teams, and mechanic units. |
| Edge Text | Laser-engraved words right on the side of the coin. | Adding secret mottos, dates, or organization names without cluttering the front. |
Interactive and Functional Upgrades
Tokens do not just have to sit on a desk. You can make them functional. Bottle opener coins are incredibly popular for casual events, sports teams, and festivals. By integrating a clever cutout into the design, the coin becomes a tool that your audience will use at every weekend barbecue.
If you are creating a limited run, you absolutely must add sequential numbering. Imagine handing someone a coin that has “042/100” laser-engraved on the back. It instantly turns the item into a rare, collectible piece of history. People value things much more when they know they belong to an exclusive, numbered club.
For a dynamic look, consider spinner coins (where the inner circle spins freely on an axis) or adding an epoxy coating. An epoxy dome is a clear, liquid resin poured over the coin. It dries hard and smooth, protecting the paint from scratches while giving the surface a beautiful, glossy shine. To explore more about how to add these amazing details, check out our Special effects for pins guide.
7. 10 Critical Mistakes Buyers Make When Ordering Challenge Coins
What mistakes should I avoid when designing and ordering challenge coins?
When ordering challenge coins, avoid making text smaller than 6pt, combining high-polish plating with detailed 3D reliefs, overcrowding the design, using tiny color areas that cause paint bleeding, and approving digital proofs without triple-checking spelling and unit designations.

Even the best ideas can turn into manufacturing disasters if you do not know what to watch out for. At Cheap Lapel Pins Factory, we have saved countless customers from making very costly design errors. Here are the top ten mistakes you must avoid to ensure your project is a massive success.
- Text That is Too Small: Metal is not paper. You cannot print a 4-point font on brass and expect it to be readable. If you make your text smaller than 6pt, the liquid metal will just pool together, turning your beautiful motto into an unreadable smudge.
- Overcrowding the Design (The “Kitchen Sink” Error): We see this often with committee designs. Everyone wants to add their favorite symbol. You end up with a medical cross, crossed swords, a bald eagle, an anchor, and four different dates all jammed onto a 1.75-inch circle. The result is total chaos. Keep it simple. One central hero image, and minor supporting details.
- Wrong Plating for 3D Details: Imagine a beautifully sculpted 3D building. If you choose a bright, high-polish gold finish, the coin acts like a mirror. The blinding glare bounces into the viewer’s eyes, completely hiding the windows and doors of the building. 3D designs must use antique finishes so the dark shadows can reveal the deep textures.
- Microscopic Color Areas: Enamel paint is a thick liquid. It needs distinct metal walls to hold it in place. If you create tiny, complex patterns and expect them to be filled with five different colors, the paint will bleed over the walls. Give your colors room to breathe.
- Ignoring the Purpose: If you design a coin that is meant to be carried in a pocket every day, do not choose a shiny, mirror-like finish without an epoxy dome. The keys in the pocket will scratch it to pieces in a week. Match the finish to the lifestyle of the coin.
- Failing to Proofread the Digital Proof: This is a heartbreak we hate to see. A customer approves a proof, we carve the steel mold, and we press 500 coins. Then, they realize they spelled “Excellence” wrong. Once the steel is carved, the mistake is permanent. Print your proof out, show it to three different people, and double-check every single letter.
- Choosing Cheap Base Metals: Do not fall for the iron trap. Iron is cheap, but it rusts. Always insist on solid brass or high-quality zinc alloy. Your members deserve a token that will outlast them.
- Forgetting About the Edges: A beautiful design on the front and back can be let down by a boring, sharp, unfinished edge. The edge is where the thumb rests. Make it feel good.
- Guessing the Thickness: Do not just accept the default. Think about who is receiving the token. If it is a major award, ask your factory to upgrade the thickness to 4mm. The extra weight changes everything.
- Ignoring the “Unspoken Signal”: Coins often carry deep emotional weight, especially for veterans and first responders. Make sure the symbols you use accurately respect the traditions of those groups.
If you want to read more about common design failures and how to fix them before production starts, dive into our Top 7 mistakes when ordering pins and our 10 critical design tips for pins.
8. The Complete Procurement Process: From Proof to Delivery
How long does the custom challenge coin production process take?
The standard production process takes about 3 to 4 weeks (10 to 20 business days), plus an initial 2 to 5 days for digital proofing and artwork approval. Always plan ahead and order at least 5 weeks before your important event.
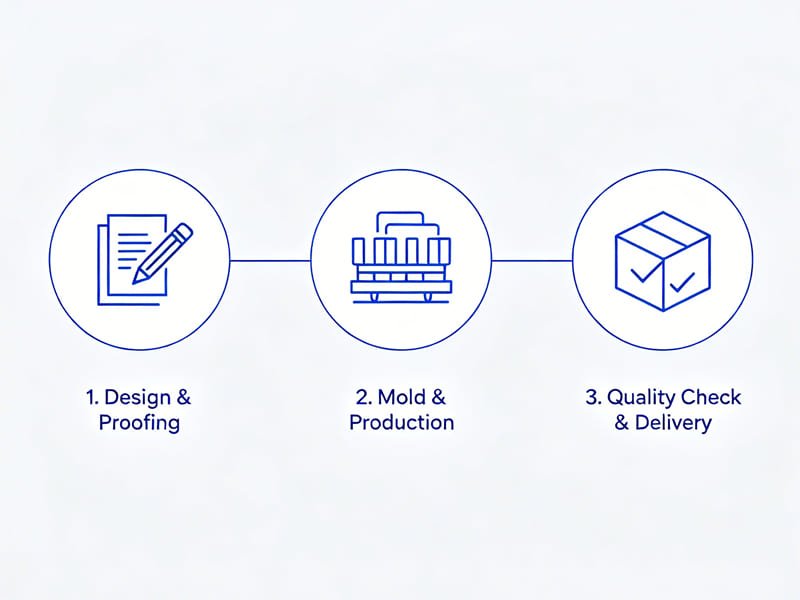
Ordering custom metalwork is not like ordering office supplies from Amazon. You cannot click a button and expect it to arrive tomorrow. It takes time, heat, and skilled human hands. Here is exactly what the timeline looks like so you can plan your schedule perfectly.
| Phase | What Happens | Estimated Timeframe |
|---|---|---|
| Phase 1: Design & Proofing | You send us your ideas, sketches, or logos. Our artists create a digital, color-coded proof showing exactly how the metal will look. You review and ask for changes. | 2 to 5 Days |
| Phase 2: Molds & Mass Production | Once you say “Yes,” we carve the steel die. We stamp the metal, cut the edges, polish off the rough burrs, apply the plating, hand-fill the enamel colors, and bake the coins in an oven. | 10 to 20 Business Days (Approx. 3-4 Weeks) |
| Phase 3: Quality Control & Shipping | We inspect every single coin under bright lights. We throw away any with paint bleeds or scratches. The perfect coins are packaged safely and shipped via air express to your door. | 3 to 5 Days |
Pro Tip: Always print your digital proof out on a normal piece of paper at 100% actual size. It looks huge and easy to read on a 27-inch computer monitor. But when you print it out at 1.75 inches wide, you might realize your text is way too small. This simple trick saves so many headaches.
9. Packaging and Presentation Strategies
What are the packaging options for challenge coins?
Packaging options range from free standard PVC pouches (great for large giveaways) to premium upgrades like clear acrylic coin capsules, soft velour pouches, and high-end solid walnut presentation boxes for VIP awards.
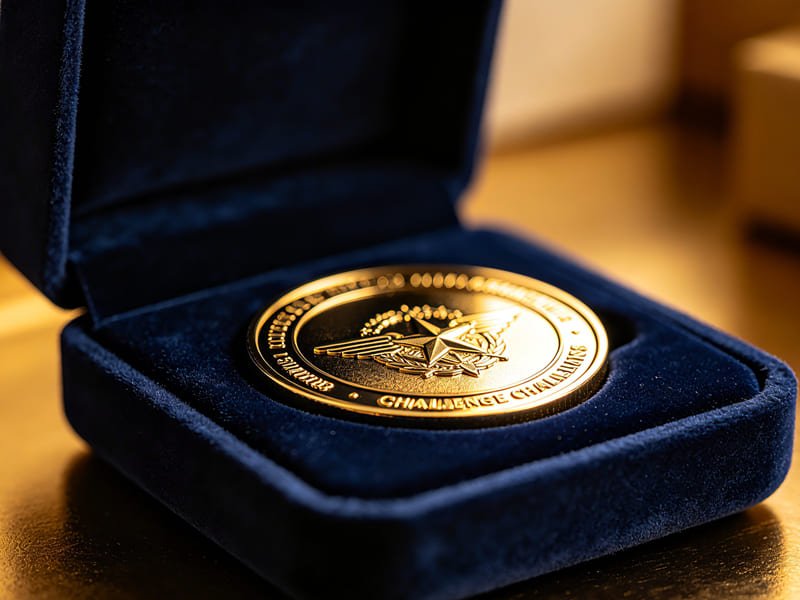
The moment of the “hand-off” is magic. When you give someone a coin, how you present it matters just as much as the coin itself. Packaging protects your investment and elevates the entire experience.
If you are giving out 500 coins to a massive crowd at a marathon or a festival, the standard clear PVC pouch is perfect. It is usually free, keeps the coins from scratching against each other during shipping, and is easy to hand out.
If you are giving the coin to a team member to keep on their desk, consider a Clear Acrylic Coin Capsule. For just a few cents more, it encases the coin in hard plastic, keeping dust and moisture away while letting them see both sides clearly.
For retirements, VIP guests, or major organizational awards, you need to go all out. A Velour Pouch or a Solid Walnut Wooden Box turns a simple piece of metal into a high-end jewel. When the recipient opens that box, the presentation takes their breath away. Read more about making a great impression in our Custom pin packaging guide.
10. Challenge Coin Care, Maintenance, and Collecting
How do I preserve and display my challenge coin collection?
Keep your coins in a dry, dust-free place, wipe them gently with a soft microfiber cloth, and avoid harsh cleaning chemicals. To display them beautifully, use acrylic stands, custom display boards, or tiered solid wooden racks.
Once you hand these beautiful tokens out, people will want to know how to keep them looking fresh for decades. Metal does tarnish over time if not treated properly. Here is what you need to tell your team about caring for their new keepsakes.
First, keep them dry. Moisture is the enemy of any metal product. If a coin gets dirty, do not use harsh bathroom chemicals or abrasive sponges. Simply wipe it down gently with a soft microfiber cloth. If your coin has a shiny gold or silver finish, try to hold it by the edges to prevent acidic fingerprints from dulling the shine.
For the avid collectors out there, gathering these tokens is a passionate hobby. Enthusiasts love to attend trade shows, join online forums, and trade rare unit coins. If you want to show off your collection at home or in the office, consider investing in a stepped wooden display rack or individual acrylic easel stands. This turns a drawer full of metal into a proud wall of accomplishments.
Conclusion: Securing Your Investment and Crafting Your Legacy
Ordering custom tokens is an incredible journey. You are taking a simple idea—a memory, a team bond, a major milestone—and forging it into a piece of solid metal that will outlast us all. But as we have explored in this guide, it is also a true manufacturing process. By understanding the real costs, avoiding cheap material traps, sizing your project correctly, and setting up the right molds, you guarantee that your investment is protected.
You now have the knowledge of an industry insider. You know why 3D designs need antique finishes, why text needs to be legible, and why thickness changes the entire feel of an award.
At Cheap Lapel Pins Factory, we believe in radical transparency. We do not hide our shipping costs, we never use cheap iron fillers, and our quality control team is relentless. We want you to feel incredibly proud the moment you hand your custom coin to your team.
Do not leave your next big event to chance. Send us your rough sketches, your logos, or just your wildest ideas. Our professional artists will create a free digital proof for you. Contact Cheap Lapel Pins Factory today and let’s craft a token that your people will carry with pride forever.
Frequently Asked Questions (FAQs)
1. What is the minimum order quantity (MOQ) for custom challenge coins?
While some manufacturers accept orders as low as 50 pieces, we highly recommend ordering a minimum of 100 coins. Because the fixed cost of creating the steel die and setting up the machinery remains the same, spreading that cost over 100 pieces significantly lowers your per-coin price, giving you the best overall value.
2. Do I have to pay the die (mold) fee every time I reorder?
No! The die fee is a strict one-time charge. Reputable factories will store your custom steel die safely on their shelves. If you need to reorder the exact same design next month or next year, you only pay for the raw materials and labor, which makes reordering much more affordable.
3. What is the difference between soft enamel and hard enamel?
Soft enamel is painted into the recessed areas of the coin and air-dried. If you rub your thumb over it, you can feel the bumpy texture of the raised metal borders. Hard enamel (imitation hard enamel) is baked at extreme heat and then polished completely flat. The paint sits flush with the metal, creating a smooth, glossy, jewelry-like finish.
4. Can I put a photograph or a complex color gradient on my coin?
Yes, but not with traditional enamel paint. Enamel requires solid metal borders to separate colors, meaning gradients (like a fading sunset) will not work. For photographs or complex shading, we use advanced UV Printing technology to print the image directly onto the metal, sealing it with a clear epoxy dome for protection.
5. Is “Free Shipping” actually free?
In the metal manufacturing industry, true free shipping does not exist. Metal is heavy, and international air shipping is expensive. Companies that advertise free shipping have simply calculated the average shipping cost and hidden it inside a higher per-coin price. It is always best to look at the transparent, final total cost of your invoice.
6. Why shouldn’t I use a shiny gold or silver finish for a 3D sculpted coin?
Shiny, high-polish finishes act exactly like mirrors. If you have a detailed 3D design—like an animal’s face or a textured building—the bright glare will bounce light everywhere, making the small details impossible to see. For 3D designs, you should always use an Antique Finish (like antique brass or antique silver). The dark patina settles into the recesses, creating shadows that make the 3D relief pop beautifully.
7. What type of image file do I need to provide to start my order?
You do not need to be a professional graphic designer to get started. While high-resolution vector files (like AI, EPS, or PDF) are perfect, we can work with almost anything. You can send us a JPG, a PNG, a photograph of an old coin, or even a rough pencil sketch drawn on a napkin. Our factory artists will redraw it into a production-ready digital proof for you.
8. Will my coins rust over time?
If you order from a factory that uses cheap iron blanks, yes, they will eventually rust if exposed to moisture. However, at Cheap Lapel Pins Factory, we only use premium solid brass, copper, or high-quality zinc alloys. These premium base metals do not rust, ensuring your commemorative tokens will last for generations if kept in a dry environment.